
Ultimate Guide to Wire Rope Replacement Standards
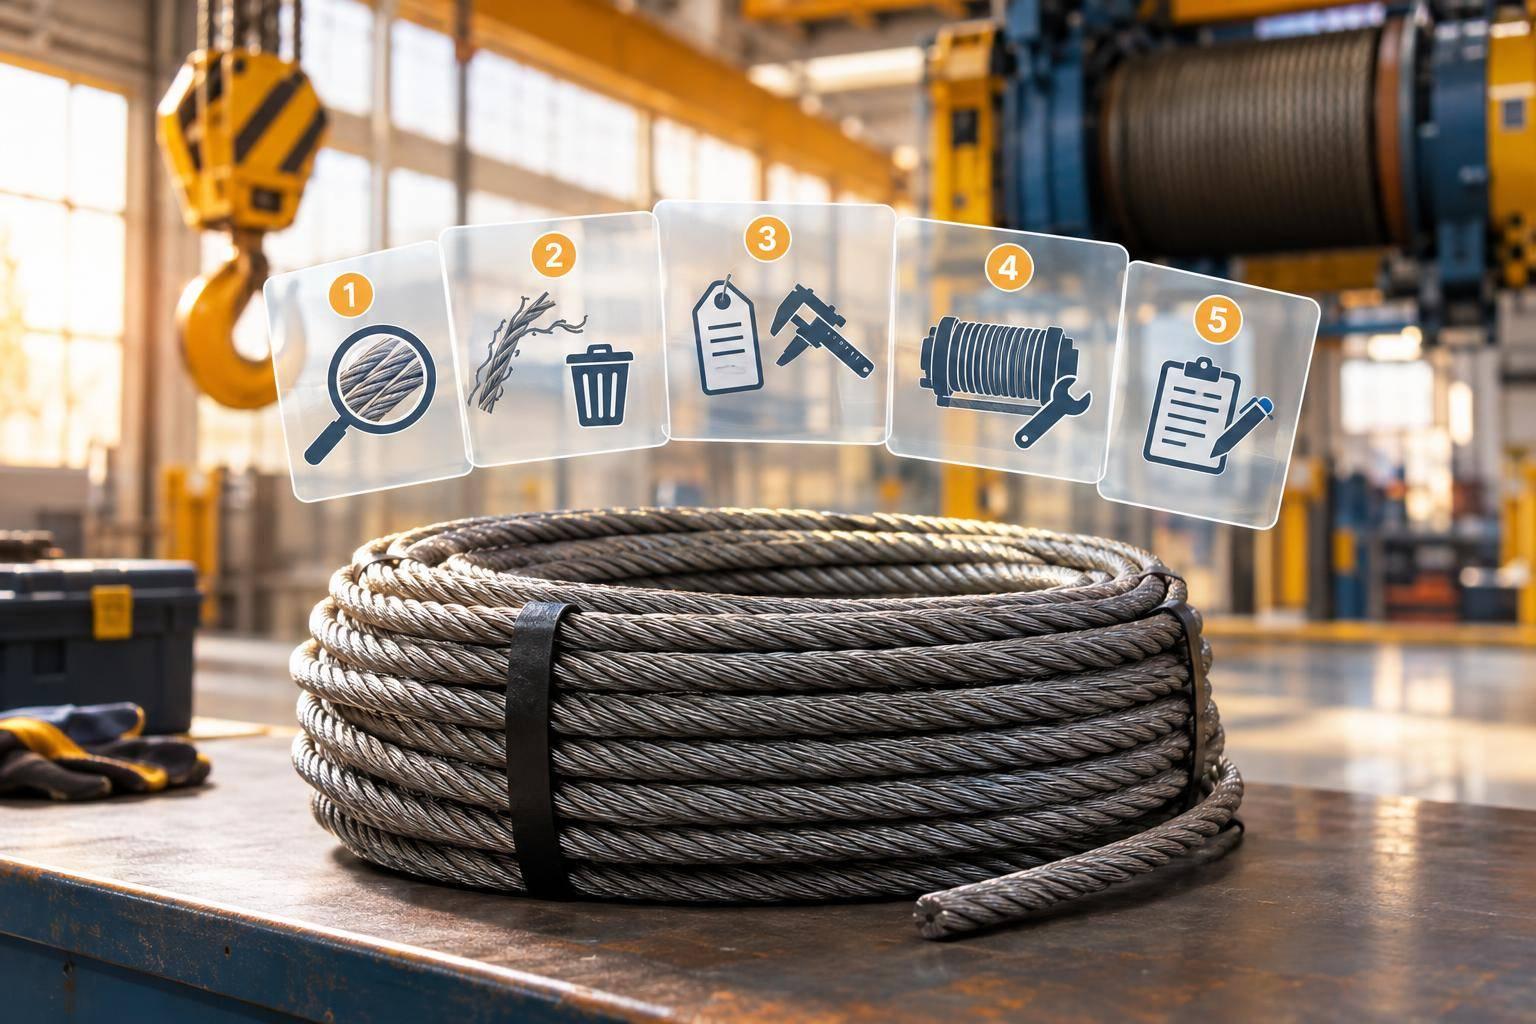
My first rule: stop using crane wire rope when it reaches an applicable removal limit - not when the replacement arrives. For construction cranes, more than 5% diameter loss is one removal trigger. Broken wires, corrosion, crushing, and heat or electrical damage also need review against the rules for your crane.
I use this checklist to keep the process clear:
- Check the rules: Identify the OSHA requirements, applicable ASME or ISO standards, and manufacturer instructions.
- Inspect and document: Check the rope, terminations, drums, and sheaves. Record defects and remove unsafe rope from service.
- Match the replacement: Verify the complete rope specification - not just the diameter.
- Install safely: Isolate energy, secure suspended parts, and follow approved reeving and termination procedures.
- Check before release: Complete required inspections and tests, document approval, and plan future inspections and maintenance.
<u>A planned replacement date never permits continued use of unsafe rope.</u>
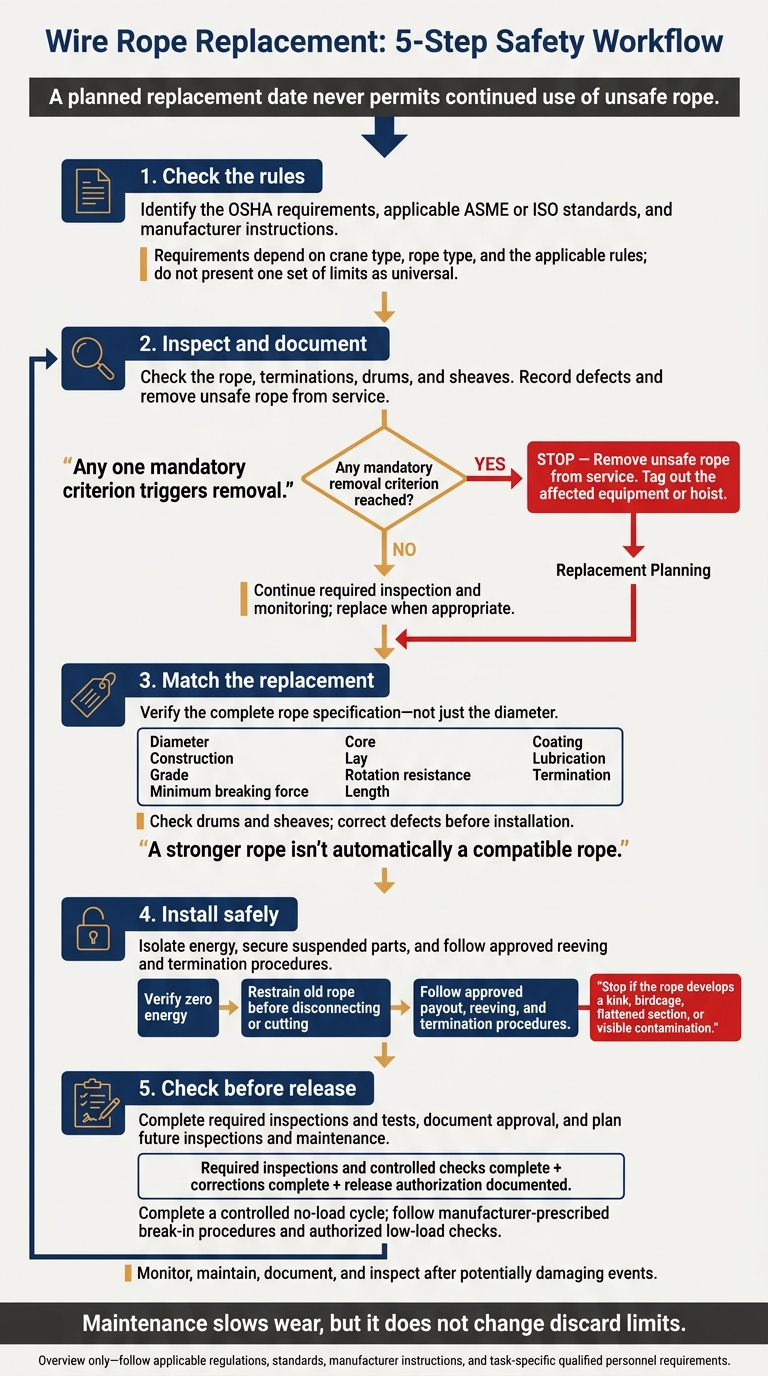
Wire Rope Replacement: 5-Step Safety Workflow
OSHA 1926.1413 – Wire Rope – Inspection (Subpart CC)
sbb-itb-6be7c12
Inspect Wire Rope and Apply Discard Criteria
Inspection determines whether a rope has reached its removal limits. For construction cranes, a competent person must inspect wire rope each shift, and a qualified person must inspect the full rope at least every 12 months. For overhead and gantry cranes, inspect the rope thoroughly at least monthly. If a rope has been idle for one month or more, inspect it before returning it to service.
Check the Rope and Related Components
Check accessible rope, drum wraps, anchorages, sheaves, equalizers, and end connections. Pay close attention to bending points, crossover zones, contamination, and terminations. Look for worn grooves, sharp edges, misalignment, loose connections, and poor seating.
A clean surface doesn’t rule out internal damage. Diameter loss or unusual stiffness may point to core deterioration, hidden corrosion, or crushing.
Assess Damage and Causes
After checking the rope and hardware, apply the discard criteria. Under OSHA’s construction-crane rule, remove a running rope when it has six randomly distributed broken wires in one rope lay or three broken wires in one strand in one rope lay. A rope lay is the length over which one strand makes a complete revolution around the rope.
Rotation-resistant ropes have different limits: two randomly distributed broken wires in six rope diameters or four randomly distributed broken wires in 30 rope diameters. For standing ropes, removal is required when there are more than two broken wires in one rope lay beyond an end connection or more than one broken wire in one rope lay at an end connection.
Measure diameter consistently with a calibrated tool. More than 5% loss from the nominal diameter requires removal for construction cranes, but this limit does not apply universally. Any one mandatory criterion triggers removal.
Check for corrosion, deformation, heat damage, electrical damage, and termination defects. Identify overloads, shock loading, poor spooling, excessive fleet angles, and derailment. Assess how defects affect the rope together rather than judging each defect alone. When removal is required, tag out the affected equipment or hoist - don’t wait for the next scheduled inspection.
Record Findings and Replacement Decisions
If any limit is exceeded, document that the rope requires removal and replacement. Record the date, inspector qualifications, rope ID, measurements, broken-wire counts and locations, damage, cause, and action taken. Also note changes in spooling, noise, vibration, and load response.
Overhead-crane certification records must include the date, inspector’s signature, and an identifier for the ropes inspected. Keep these records readily available to authorized personnel.
Use the same measurement points to track wear over time, but never let a gradual wear trend override a mandatory removal criterion. Document the condition, action taken, and return-to-service status.
Choose a Compatible Replacement Rope
Once a rope meets discard criteria, match the full replacement specification - not just its diameter. Start with the crane or hoist manufacturer’s manual, rope chart, parts list, reeving diagram, and nameplate. For overhead cranes, match the original size, grade, and construction unless the rope manufacturer approves a change for the actual working conditions.
Verify Rope Specifications
Confirm the rope’s diameter, construction, grade, minimum breaking force, core, lay, rotation resistance, length, coating, lubrication, and termination. Record diameter in inches and length in feet. Add metric units only when the equipment documents use them. Check that the rope suits the reeving arrangement, duty cycle, speed, and exposure to heat, abrasion, or corrosion.
A stronger rope isn’t automatically a compatible rope. Changing the construction or lay can affect rotation behavior, bending fatigue, and spooling. Before changing specifications, get written approval from the crane manufacturer, a qualified engineer, or the rope manufacturer. Compare the delivered rope and its certificate with the approved specification, then file the manufacturer, batch ID, and minimum breaking force rating.
After checking the rope, inspect the drum and sheaves before installation.
Check Drums and Sheaves
Measure drum and sheave diameters, groove profiles, alignment, and anchorage dimensions against the manufacturer’s requirements. Verify the D/d ratio: the pitch diameter divided by the rope diameter. Check guards, rope keepers, termination fit, and drum storage capacity. For overhead cranes, the selected rope length must leave at least two wraps on the drum when the hook reaches its lowest position.
Correct worn grooves, surface defects, damaged guards, and spooling problems before installing the replacement. Check any machining, replacement, or alignment work against the manufacturer’s dimensions before installation proceeds.
With the rope and hardware checked, proceed to safe removal and installation.
Remove and Install Wire Rope Safely
Isolate the Crane and Remove Old Rope
With the replacement rope selected and hardware verified, take the crane out of service before removing the old rope. Notify affected workers. Confirm PPE, fall protection, emergency procedures, and the site’s lockout/tagout or equivalent energy-control procedure. Isolate electrical, hydraulic, pneumatic, gravity, and stored mechanical energy, then verify zero energy. Secure the hook block, boom, trolley, and any other suspended components against movement. Barricade the work area, and keep workers who aren’t needed outside the exclusion zone and snapback zones.
Release tension and restrain the old rope before disconnecting or cutting it. Keep workers clear of loops, pinch points, and snapback zones. Use rated equipment to prevent uncontrolled unspooling. Tag and separate discarded rope so it can’t be reused. Inspect exposed anchorages, guides, sheaves, guards, bearings, and termination parts. Correct any defects before continuing.
Pay Out, Reeve, and Attach New Rope
Once the old rope is clear, install the new rope along the approved reeving path. Mount the reel on a suitable payoff stand or shaft, keeping the rope aligned with the drum or first sheave. Pay it out straight, without slack, side loading, reverse bends, or loops. Use only the approved pulling connection or swivel when required, and install the specified seizings before cutting. Stop if the rope develops a kink, birdcage, flattened section, or visible contamination.
Follow the crane manufacturer’s reeving diagram. Check the winding direction, drum anchorage, even wraps, required dead wraps, sheave seating, and line equalization. Install terminations using the specified hardware, orientation, securing method, and torque. Have a qualified person check the completed rope path and connections.
Complete Return-to-Service Checks
After installation, complete controlled checks before returning the crane to service. Verify guards, fasteners, limit devices, rope seating, anchorage, and attachments. Then run a controlled no-load cycle through the permitted travel range, checking tracking and spooling. Stop immediately if you see rubbing, climbing, slack rope, uneven winding, or termination movement.
Complete any manufacturer-prescribed break-in procedure, then perform the low-load checks authorized in the plan. Reinspect connections after initial operation. Document the rope ID, installation date, installer and inspector, termination method, drum-wrap verification, test results, corrections, and release authorization.
Maintain Wire Rope and Plan Service
After return-to-service checks, move to routine monitoring and planned replacement.
Reduce Rope Wear and Damage
Clean the rope using an approved method. Choose a lubricant that works with the rope’s construction and existing lubricant without hiding defects. Maintenance slows wear, but it does not change discard limits. Lubrication helps prevent damage; it cannot reverse damage or serve as a way to conceal it.
Protect wire rope from welding arcs and current, sparks, molten metal, corrosives, abrasives, and sharp edges. Evaluate any suspected arc strike, heat damage, chemical attack, or electrical damage before using the rope again.
Keep the fleet angle within the crane manufacturer’s range. Watch for loose wraps, piling, and uneven spooling. If these problems persist, stop operation. Have a qualified person correct the rope path, drum, guides, grooves, and sheaves before more damage occurs.
Train operators to report visible damage, unusual vibration, and changes in hoisting behavior. After an overload, shock load, derailment, or other event that could damage the rope, get an additional inspection - don’t wait for scheduled service. Use these warning signs to decide when the rope needs closer inspection or removal.
Schedule Replacement and Qualified Support
Plan service around inspection findings, spare-parts availability, and access to qualified personnel.
Retain the last three monthly inspection records and keep the annual inspection record for at least 12 months. Store rope identification, installation history, lubrication records, defects, abnormal events, and corrective actions together. Use that history to spot recurring wear and guide maintenance and purchasing.
Confirm that rope and fittings will be available before the planned replacement window. Allow time to correct related defects, too. Never delay required removal to meet a production schedule.
Operator certification alone does not qualify someone to inspect, replace, terminate, or return rope to service. Verify training and experience for each task, and assign responsibility for technical evaluation and return-to-service approval.
For crane and wire-rope support in Arkansas, Texas, Oklahoma, and Louisiana, contact TDS Erectors & Crane Service. Provide the crane make and model, rope specs, known defects, and preferred service date.
Conclusion: Wire Rope Replacement Checklist
Use this checklist before returning a repaired or replaced rope to service.
Rule and condition: Follow the governing standard and use inspection findings to decide whether the rope can stay in service or must come out. Document defects and apply the governing discard criterion.
Replacement and hardware: Verify the rope’s diameter, length, construction, grade, core, lay direction, and minimum breaking force. Check the certificate and receiving inspection. Before installation, correct defects in the drum, sheaves, alignment, bearings, and anchorage.
Safe installation: Once the rope and hardware are approved, isolate the crane and control stored energy. Follow the approved payout, winding, tensioning, and reeving procedure. Confirm the required drum wraps, rope seating, and terminations.
Release and records: Complete the required visual inspection and no-load checks, plus controlled-load checks where required. Before release, a qualified person must confirm that no hazardous rope deficiencies remain. Keep the rope ID, inspection findings, certificates, repair records, test results, and return-to-service approval.
If any mandatory limit is reached, stop the job immediately. Planned replacement does not allow continued operation. Tag out the crane or affected hoist until repair or replacement is complete.
FAQs
Which rule applies if wire rope standards conflict?
When wire rope standards conflict, inspections and maintenance must follow both the manufacturer’s guidelines and applicable OSHA standards.
OSHA-approved state plans may set additional requirements or stricter rules than federal regulations. Employers must regularly review the state standards that apply and include those requirements in their safety procedures to stay fully compliant.
Does replacing wire rope require a load test?
Replacing wire rope does not automatically require a load test. Inspection and removal criteria still apply, including OSHA’s broken-wire limits for wire rope slings.
When a crane or rigging is repaired, altered, or newly introduced, OSHA requires proof/load testing before first use or return to service. Test loads are commonly 110% for mobile cranes and 125% for overhead/gantry cranes, unless the manufacturer requires less.
How can I detect internal wire rope damage?
During regular inspections, check for core protrusion, bird-caging, or localized wear - these can point to internal damage. Internal corrosion and fatigue may not leave visible surface signs. Use digital calipers to measure any reduction in diameter and compare it with the manufacturer’s recommendations.
Keep a record of inspection results to spot patterns that may suggest internal damage. If you suspect damage, consult a professional to determine whether replacement is needed.
Related Blog Posts
Blogs, calculators, and other content on the TDS blog is for educational purposes only and does not constitute crane or rigging advice. For information specific to your situation, please contact us for an estimate or consultation.
Related Articles
OSHA Safety Standards Analyzer
Ensure OSHA compliance with our free Safety Standards Analyzer. Identify gaps in your construction site safety measures and get actionable fixes fast!
Wind Speed Limits for Crane Operations
Wind thresholds, measurement tips, and manufacturer-based stop-work rules to keep crane lifts safe in gusty conditions.

Ultimate Guide to Commercial Welding Services
Explore essential welding techniques, safety protocols, and cost-effective strategies for successful commercial welding projects.